How to Build a DIY Powder Coating Oven: A Step‑by‑Step Guide
If you’ve ever wanted the glossy finish of professionally coated metal without the shop price tag, a DIY powder coating oven might be the answer. The basic idea is simple: heat a sealed chamber to cure electrostatically applied powder, turning it into a hard, uniform paint. Below you’ll find everything from raw material choices to the final safety check, so you can start coating bike frames, automotive parts, or garden tools from the comfort of your garage.
Gathering Materials and Tools
Before you cut any metal, make a checklist. Typical components include a steel or aluminum box (12‑24 inches on a side works for most hobby projects), a high‑wattage electric heating element, an insulated lid, a temperature controller (PID units are popular), and a simple thermostat or digital readout. You’ll also need a few basic tools: a drill with metal bits, a metal saw or angle grinder, a sheet‑metal bender, and a set of heat‑resistant wiring connectors. Don’t forget safety gear—gloves, safety glasses, and a respirator for any cutting work.
Preparing the Workspace
A clean, well‑ventilated area is essential. Lay down a fire‑retardant mat or a metal sheet to catch any stray sparks while you assemble the oven. If possible, work near a grounded outlet that can handle the load; most 1500‑W heating elements draw about 12 amps, so a dedicated circuit is ideal. Keep a fire extinguisher handy, and make sure the space complies with local electrical codes—sometimes a quick call to an electrician can save headaches later.
Building the Heating Chamber
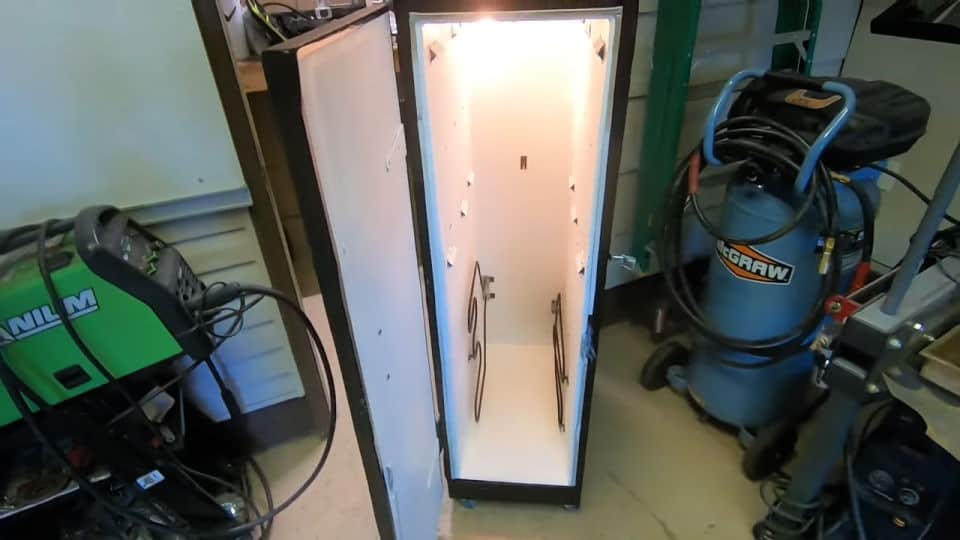
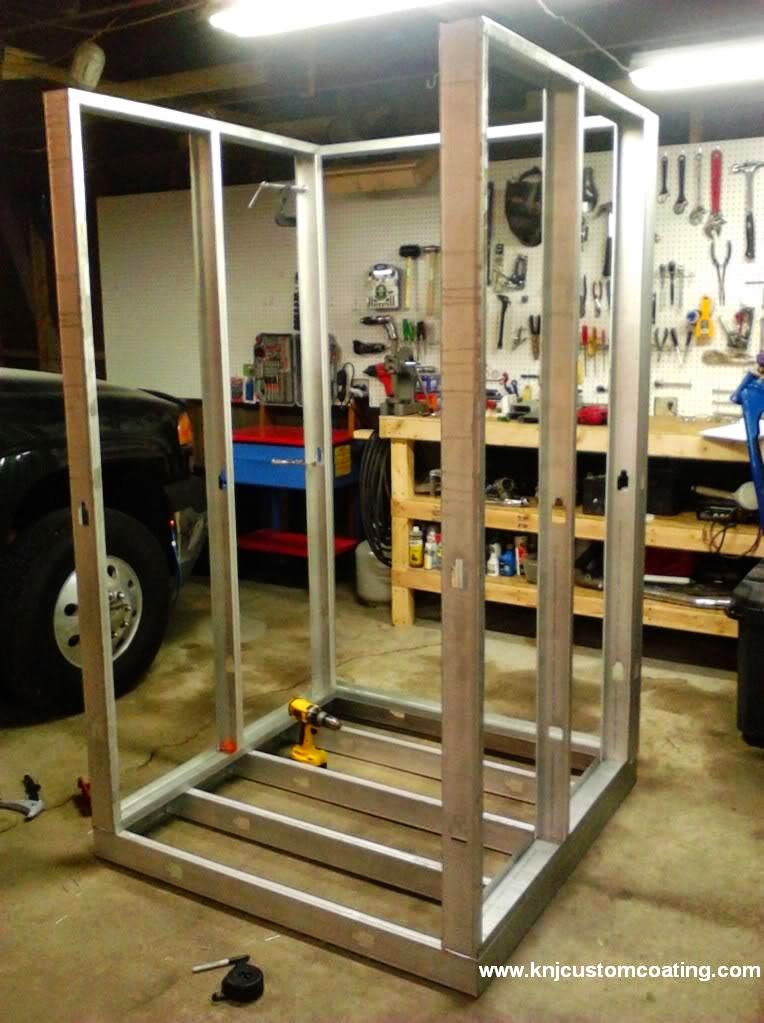
Start by cutting the metal box to your desired dimensions. The walls should be at least 1/8‑inch thick to retain heat without warping. After assembly, line the interior with a thin layer of high‑temperature ceramic insulation; this reduces energy consumption and helps maintain an even temperature. Drill a 1‑inch hole for the heating element, and another for the temperature sensor. Position the element near the bottom so hot air circulates upward, mimicking commercial ovens.
Installing the Temperature Control System
A reliable PID (proportional‑integral‑derivative) controller will keep the oven within the 350‑400 °F range required for most powder coatings. Mount the controller on the outside of the box, then thread the temperature probe through the dedicated hole, securing it near the chamber’s center. Connect the heating element to the controller’s output terminals, following the wiring diagram provided by the manufacturer. If you’re using a simple thermostat, set it to “on” at 350 °F and “off” at 380 °F to create a narrow heating band.
Wiring, Grounding, and Safety Checks
All electrical connections must be rated for at least 1500 W and protected by a dedicated circuit breaker. Use heat‑shrink tubing on every splice, and route the wires through a conduit that can handle the oven’s exterior temperature. Ground the metal chassis with a copper strap connected to the same earth point as your outlet; this prevents stray currents that could interfere with the powder’s electrostatic charge. Before plugging in, double‑check that no wires are pinched or exposed.
First Test Run (Without Powder)
Power up the oven and set the controller to 350 °F. Allow the chamber to reach temperature and hold for 10‑15 minutes—this “burn‑in” helps verify that the insulation holds and there are no hot spots. Use a handheld infrared thermometer to scan the interior; variations beyond 10 °F suggest you may need to reposition the heating element or add more insulation. Once the temperature is stable, let the oven cool completely, then inspect the lid seal for any gaps that could let heat escape.
Coating a Test Piece
Choose a small steel bracket as your first project. Clean it thoroughly with a solvent, then apply a thin coat of powder using a handheld spray gun. Place the piece on a non‑conductive rack inside the oven, close the lid, and start the curing cycle—typically 10‑15 minutes at 350 °F for most standard powders. After the cycle, let the part cool naturally; it should emerge with a smooth, matte finish that can be sanded or polished as needed.
Tips for Better Results
- Preheat the powder. Warming the powder slightly (to about 70 °F) improves flow and reduces clumping.
- Maintain a clean interior. Residual powder can burn and create unpleasant odors, so wipe the chamber after each use.
- Use a timer or programmable controller to avoid over‑curing, which can make the coating brittle.
- Consider adding a small fan for forced convection; it promotes more uniform heating on larger parts.
Frequently Asked Questions
Can I use a standard kitchen oven for powder coating?
Technically yes, but kitchen ovens aren’t designed for the high temperatures or continuous operation required for powder curing. They also lack proper ventilation, which can lead to odor buildup and potential fire hazards. A dedicated DIY oven with proper insulation and temperature control is a safer, more reliable choice.
What safety equipment is essential when building the oven?
At minimum, wear heat‑resistant gloves, safety glasses, and a respirator when cutting metal. Keep a Class ABC fire extinguisher nearby, and ensure all electrical work complies with local codes—using a GFCI outlet adds an extra layer of protection.
How long does the oven typically last?
With quality steel, proper insulation, and routine maintenance, a DIY powder coating oven can serve you for several years. The most common wear points are the heating element and the temperature sensor, which are inexpensive to replace when needed.
Is it possible to coat large items like car doors?
Large panels require a bigger chamber and more powerful heating elements to maintain uniform temperature. Scaling up is feasible, but you’ll need to consider heavier insulation, stronger supports, and a higher‑capacity power supply to avoid uneven curing.