How to Solder Resistors onto a PCB: A Beginner’s Guide
Why Proper Resistor Soldering Matters
When you’re building a hobby project or repairing a broken device, the reliability of each component hinges on a solid connection. A poorly soldered resistor can introduce stray resistance, cause intermittent failures, or even short‑circuit adjacent traces. For beginners, mastering the art of soldering resistors to PCBs (printed circuit boards) is the first step toward trouble‑free electronics.
Essential Tools and Materials
Before you fire up the iron, gather a modest toolkit. You don’t need a professional workshop; a few well‑chosen items will keep the job clean and safe.
- Soldering iron: 25‑30 W with a fine‑point tip works well for most through‑hole work.
- Solder: 60 % tin / 40 % lead is forgiving, but lead‑free (Sn‑99.3 % Cu‑0.7 %) is acceptable if you prefer it.
- Helping hands or a PCB holder: Keeps the board steady while you work.
- Wire cutters / diagonal pliers: For trimming leads after soldering.
- Flux pen or paste: Improves wetting and reduces oxidation.
- Safety gear: Small goggles and a well‑ventilated area are a must.
Choosing the Right Soldering Iron
A temperature‑controlled station is ideal because you can dial in the sweet spot—typically 350 °C for leaded solder and a bit higher for lead‑free. If you’re on a budget, a simple plug‑in iron with a replaceable tip will do, just be sure not to let it sit idle for too long; excess heat can damage the board’s copper pads.
Preparing the PCB and Resistor
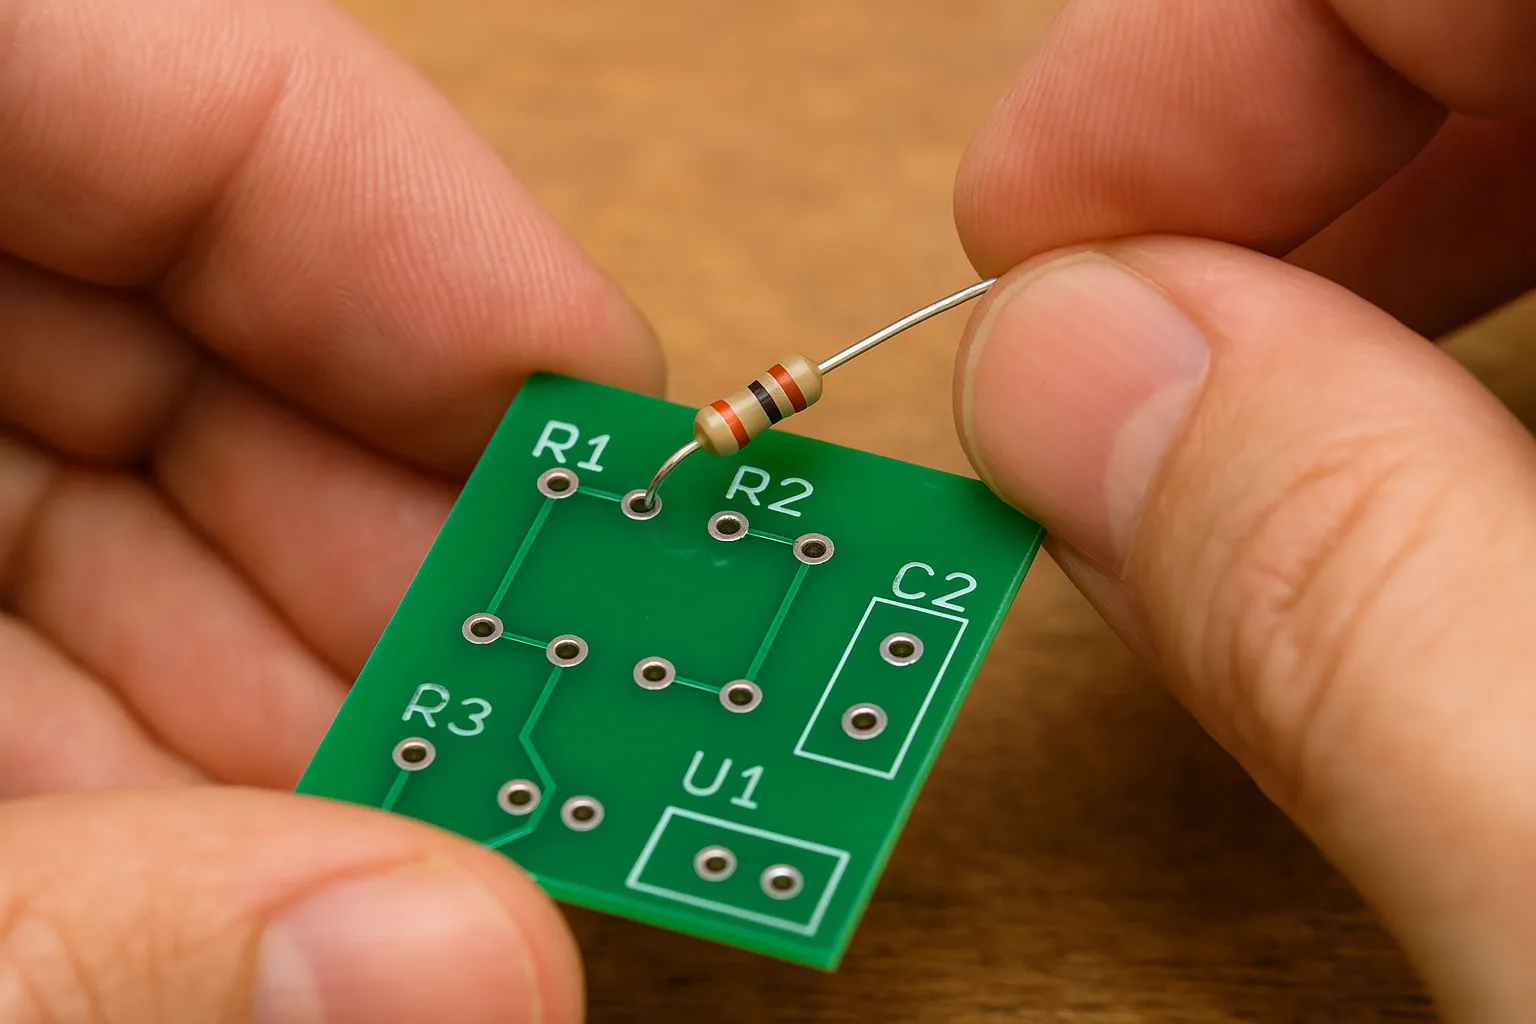
Start by inspecting the board for any oxidation or debris. A quick brush with a dry toothbrush or a dab of isopropyl alcohol will clear the surface. Next, identify the correct resistor footprint—usually two through‑hole pads spaced 5 mm apart for standard ¼‑W parts.
Check the resistor’s color bands, calculate its value, and confirm it matches the schematic. If you’re working with a kit, the parts list often specifies the exact footprint, saving you a costly mistake later.
Step‑by‑Step Soldering Process
Follow these steps methodically; the rhythm becomes second nature after a few tries.
- Secure the board: Clamp it in the helping‑hands device so the pads are exposed.
- Apply flux: A thin line of flux on each pad helps the solder flow evenly.
- Tin the iron tip: Melt a tiny blob of solder on the tip; this improves heat transfer.
- Position the resistor: Insert the leads through the holes; the longer lead should protrude slightly on the opposite side.
- Heat the joint: Touch the iron to both the pad and the lead simultaneously. After a second or two, feed solder into the joint—not directly onto the iron.
- Form a smooth fillet: The solder should wrap around the lead and spread across the pad, forming a shiny, convex shape.
- Remove heat: Pull the iron away, then let the joint cool naturally for a few seconds.
- Trim excess lead: Use wire cutters to snip the lead close to the board, leaving a neat finish.
Repeat the process for the second side of the resistor. Consistency is key; aim for identical fillets on both ends.
Common Pitfalls and How to Avoid Them
Cold joints. If the solder looks dull or grainy, the joint is likely cold. Reheat, add a pinch of fresh solder, and ensure the iron stays on the pad long enough to melt the solder fully.
Bridging pads. Too much solder can create a short between adjacent pads. Use a solder wick or desoldering braid to lift excess material, then clean the area with alcohol.
Overheating. Leaving the iron on a pad for more than a few seconds can lift the copper pad from the board. Work quickly but deliberately, and let the iron rest between components if it feels hot to the touch.
Testing Your Work
Once all resistors are in place, give the board a visual inspection. Look for uniform fillets, no stray solder blobs, and properly trimmed leads. A multimeter set to continuity can verify each resistor’s connection: place the probes on either side of the component and confirm a low‑resistance reading (aside from the resistor’s own value).
If the circuit is part of a larger assembly, power it up with a current‑limited supply. Watch for any unexpected heating at the solder joints—this often signals a hidden short.
Tips for Faster, Cleaner Solder Joints
- Use a damp sponge or brass tip cleaner to remove oxidation from the iron between joints.
- Pre‑tin the leads of the resistor with a tiny amount of solder before insertion; this speeds up the final soldering step.
- Work in a well‑lit area; a magnifying lamp helps you spot tiny bridges.
- Practice on a scrap board first; muscle memory is the best teacher.
Frequently Asked Questions
Do I need leaded solder for beginner projects?
Leaded solder melts at a lower temperature and flows more easily, making it forgiving for novices. However, lead‑free solder is safer for health and the environment, and modern irons can handle the slightly higher temperature required.
Can I reuse a resistor after desoldering it?
Yes—provided the component and its leads aren’t damaged. Use a desoldering pump or braid to remove the old solder, clean the leads, and inspect the resistor for any cracked body or broken leads before re‑installing.
What’s the ideal amount of solder for a through‑hole resistor?
Just enough to form a smooth, shiny fillet that covers the pad and wraps around the lead. Over‑soldering creates bridges; under‑soldering leads to weak connections.
Is it okay to solder a resistor directly onto a surface‑mount board?
Surface‑mount boards typically use SMT resistors, but you can adapt a through‑hole part by using a small adapter or by soldering the leads to adjacent pads. It’s not the cleanest solution, but it works in a pinch.