How to Zip Files from Ubuntu’s Command Line – A Quick Guide
When you need to compress a handful of logs, archive a project, or just save space on an Ubuntu server, the zip utility is often the first tool that comes to mind. Unlike graphical archivers, the command‑line version works everywhere, scripts nicely, and gives you fine‑grained control over compression levels and file selection. This guide walks you through the most useful Ubuntu command line zip commands, from the simplest one‑liner to a few tricks that make daily archiving smoother.
Getting Started with Ubuntu Command Line Zip
The zip package is usually pre‑installed on recent Ubuntu releases, but if it’s missing you can add it with a single apt command:
sudo apt update && sudo apt install zip unzip
Once installed, the basic syntax mirrors the classic zip archive.zip file1 file2 … pattern: the first argument is the name of the archive you want to create, and everything that follows are the files or directories to pack.
Basic Compression: One File, One Archive
To compress a single file, run:
zip backup.zip notes.txt
This creates backup.zip in the current directory and stores notes.txt inside. If backup.zip already exists, zip adds the new file and updates the archive’s index automatically.
Bundling Multiple Files and Directories
If you have several related files, list them all after the archive name:
zip project.zip main.c utils.c README.md
For entire directories, add the -r (recursive) flag. This tells zip to walk through the folder tree and include every sub‑file:
zip -r source_code.zip src/ include/ Makefile
Notice how the command preserves the directory structure inside the zip file, making extraction later a breeze.
Choosing Compression Levels
By default, zip uses a moderate compression level (6 out of 9). If you need faster processing, lower the level with -0 (store only) or -1 (fastest). For maximum compression, use -9:
zip -9 bigdata.zip data/*.csv
Higher levels take more CPU time, so balance speed against archive size based on your workload.
Excluding Unwanted Files
Sometimes a directory contains temporary or hidden files you don’t want to archive. The -x option accepts patterns to skip:
zip -r project.zip . -x "*.log" "tmp/*"
This command zips everything in the current folder but leaves out any .log files and everything inside the tmp subdirectory.
Adding Password Protection
While zip isn’t a substitute for full‑disk encryption, a simple password can deter casual snooping. Use the -e flag, and you’ll be prompted to enter a passphrase:
zip -e secret.zip confidential/*
Remember that the encryption used by the traditional zip format is relatively weak; for highly sensitive data, consider GPG or OpenSSL instead.
Inspecting an Archive Without Extracting
Before you unpack a zip file on a production server, you might want to see its contents. The -sf (show files) flag lists the archive’s entries:
zip -sf backup.zip
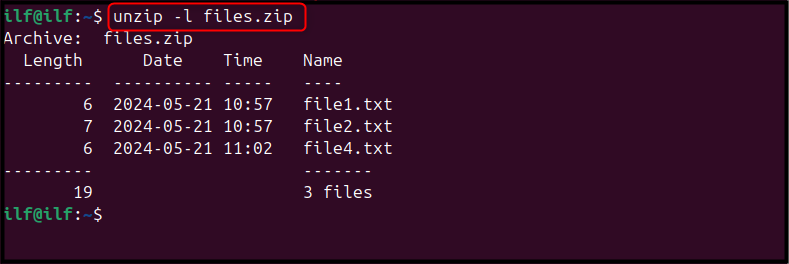
You can also get a quick size summary with -l (list) which displays each file’s uncompressed size and the total compression ratio.
Extracting Files Safely
To unpack a zip archive, the companion tool unzip does the heavy lifting. A basic extraction looks like:
unzip backup.zip
If you prefer to extract into a specific directory, add the -d option:
unzip backup.zip -d /var/restores
When dealing with archives that contain paths you don’t trust, consider the -n flag to never overwrite existing files, or use -j to junk the paths and dump everything into the current folder.
Common Pitfalls and How to Avoid Them
1. Missing files after extraction – Often this happens because the archive was created without the -r flag, so subdirectories were left out. Double‑check your command if you expected a full folder tree.
2. Permission errors – When extracting as a non‑root user, you might hit “permission denied” on protected paths. Use sudo unzip … only when you truly need elevated rights.
3. Corrupt archives – If unzip reports “cannot find zipfile directory,” the file may have been truncated during transfer. Re‑download or verify the checksum before trying again.
Putting It All Together: A Real‑World Script
For routine backups, you can wrap the commands in a short Bash script:
#!/bin/bashDATE=$(date +%F)
TARGET="/var/logs/$DATE.zip"
zip -r -9 "$TARGET" /var/log/*.log -x "*debug*"
echo "Backup saved to $TARGET"
This snippet creates a date‑stamped archive of all log files, skips debug logs, and uses maximum compression. Schedule it with cron and you’ve got hands‑free archiving.
FAQ
Can I update an existing zip file without recreating it?
Yes. Running zip with the same archive name automatically adds new files or replaces older versions, so you can incrementally grow an archive.
Is the zip format compatible with Windows?
Absolutely. The .zip extension is a universal standard, and files created on Ubuntu will open natively in Windows Explorer, macOS Finder, and most archive utilities.
How do I test the integrity of a zip archive?
Use zip -T archive.zip. The command checks each entry’s CRC and reports any mismatches, helping you catch corruption before extraction.
What’s the difference between zip and tar.gz?
Both compress data, but zip stores a directory table inside the archive, making it self‑extracting on many platforms. tar.gz first bundles files with tar then compresses the bundle, usually yielding slightly better compression ratios but requiring separate tools to create and extract.